


|
|
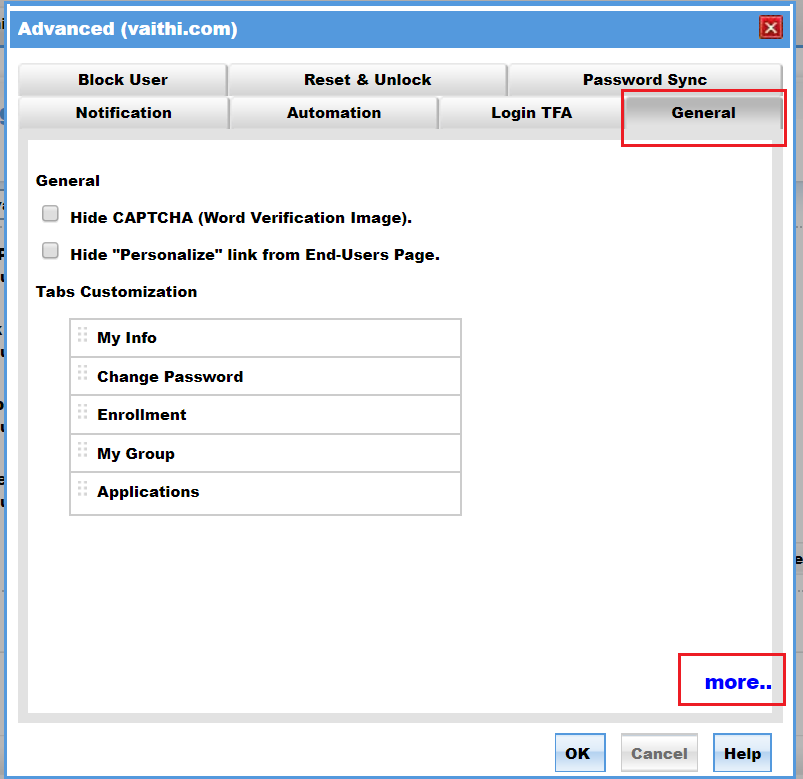
Under the General tab,you are provided with the following options:
Hide CAPTCHA (Word Verification Image)
As the name suggests,by enabling this checkbox,you can hide the CAPTCHA feature from the following pages:
Verification Code Page & Google Authenticator Code Page
Reset Password & Unlock Account Page
Security Question(s) Page
The above mentioned options come into focus when you enable the 'Hide CAPTCHA' checkbox..
|
|
You - as the administrator - are provided with the option of 'selecting the pages' from which the 'CAPTCHA' feature would be removed. |
Hide Personalize tab from End-Users Page:
By enabling this checkbox,you can hide the 'Personalize' tab from the end-user page.
Here you can drag and drop the tabs in the order you want them to appear when end-users log in to the self-service portal. Also, you can make a tab as the default tab. When users log in to the self-service portal, the default tab will be shown. To set a tab as default, move the cursor to the top-right corner of a tab. You will see a small tick mark appear. Click on the tick mark to set that tab as default.
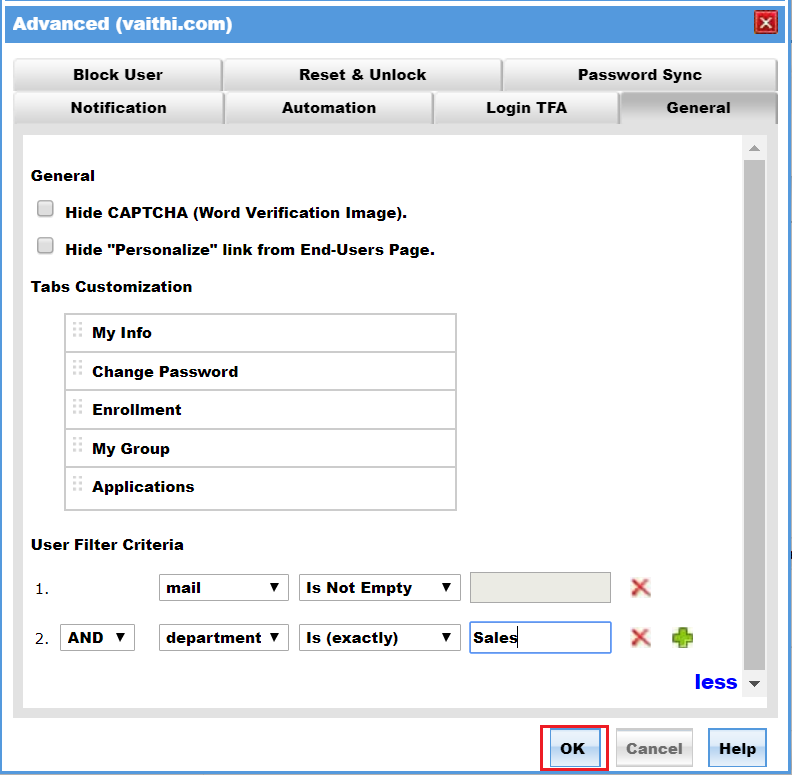
User Filter Criteria
In ADSelfService Plus, you can configure self-service policy solely based on OUs/ groups present in Active Directory. With user filter criteria, you can build fine-grained self-service policies based on Active Directory attributes-mail, mobile, and department.You can also filter users based on the custom LDAP attributes configured in ADSelfService Plus.This will ensure that the policy's settings are applied only to users who satisfy the criteria used in the filter.
For example, you can configure SMS-based two-factor authentication for all users in the domain. Then you can use the 'mobile' attribute in AD as the criteria for user filter and set the condition to 'is not empty'. This prevents users who will not be able to use SMS-based authentication to not fall under the purview of the policy.
You can Add Filters to refine users, under these policies, based on the Active Directory attributes. Choose actions to include/exclude certain users, from these policies, therefore providing selective privileges to these users.
Navigate to Configuration → Self-Service → Policy Configuration.
Click the Advanced settings of a policy.
Select the General tab.
In the bottom-right corner, you will see a more link. Click it.
Click Add Filter.
In the first drop-down list, select an AD attribute.You can choose from three default AD attributes-mail, mobile, and department, or a custom LDAP attribute.
In the second drop-down list, select the condition.
In the third drop-down list, enter a value.
You can even combine two or more criteria using a logical operator.
Once you have set the necessary criteria, click OK to save the filter.
|
|
|
|